
...
Within a Ingest Task the user has to make sure that the predecessor tasks are correct before the ingest and cleanup happens.
Changing dataproducts to ingest
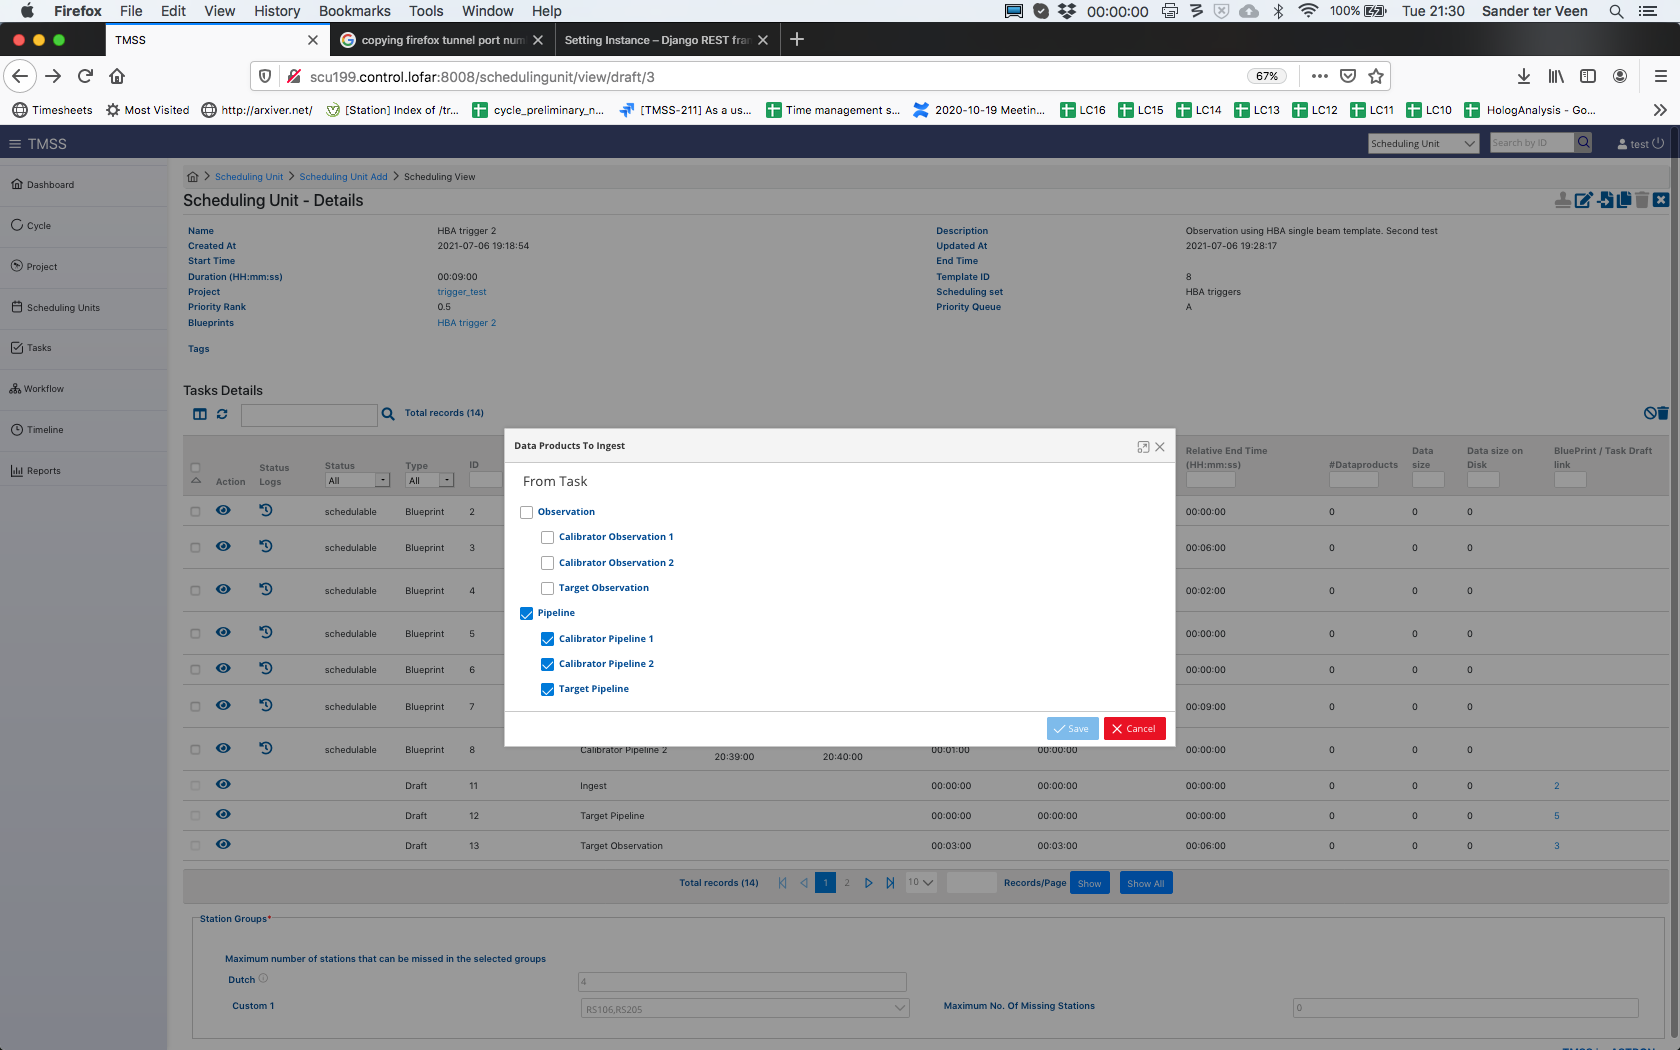
The dataproducts to ingest are part of the observing strategy. For most observing strategies, we only ingest the pipeline data. To change this, and ingest for example also the raw data, navigate to the scheduling unit page and press the ingest button ![]() . This gives a pop-up where you can select which data products to ingest.
. This gives a pop-up where you can select which data products to ingest.
This can be done both for drafts and blueprints.
Bulk Scheduling Units Specification (Scheduling Sets)
During the creation of a SU, the user can add the SU to a Scheduling Set which can be used as an easy filter in the SU menu to search for the appropriate tasks, but if for example the one pointing the SU has been created for is part of many different SUs in a project, then it has to be sorted into the correct Scheduling Set belonging to that one project. A user can also create multiple SUs at once that are then belonging to such a scheduling set by using the ![]() button. This introduces the following menu to the user:
button. This introduces the following menu to the user:
...
This concludes the Observation Specifications description. However, this is not where the responsibilities of the FoP end, as after the observation was successful the FoP has to do the Reporting.
Reporting
Currently the Reporting tab in TMSS is incomplete and reporting on a scheduling unit level is not yet possible. We will be complete the QA workflow together with the TO and the PI.
QA workflow
Accessing the workflow view
There are multiple ways to access the workflow administration space for a given SU:
- If looking for a specific workflow, it is possible to find it by:
- Using the search field in the upper bar on every TMSS page we can search for SUs using their blueprint IDs. The drop down menu next to the search box needs to be set to the (default) value of 'Scheduling Unit' (it can also be used to search for Task and Sub-task IDs).
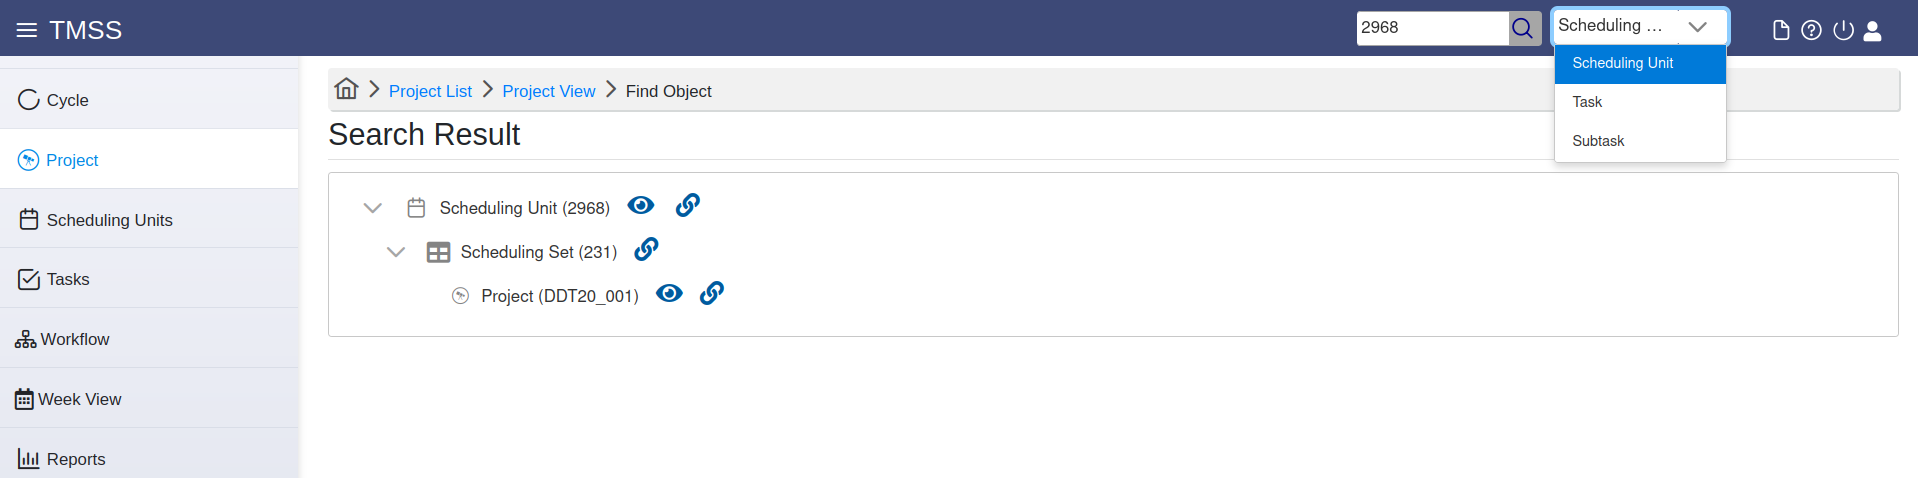
Then, click on the 'eye' icon next to the scheduling unit, and on the SU details screen which will open, click on the 'workflow' icon (![]() ; second from the left in the row of icons on the top right of the page, across the page title).
; second from the left in the row of icons on the top right of the page, across the page title).
- Going to the scheduling units menu page, selecting Blueprint from the top drop-down menu, then enter the SU blueprint id in the corresponding column and press "Enter" to search. Then, we click on the Eye icon on the left to see the SU blueprint. Once on the details page, we click on the View Workflow icon (second from the left at the top of the page). The workflow page for this SU opens.
- If one wants to access workflows that require actions, we can use the workflow menu page accessible by clicking the corresponding menu item on the TMSS main menu on the left of the page, a listing of workflows will appear:
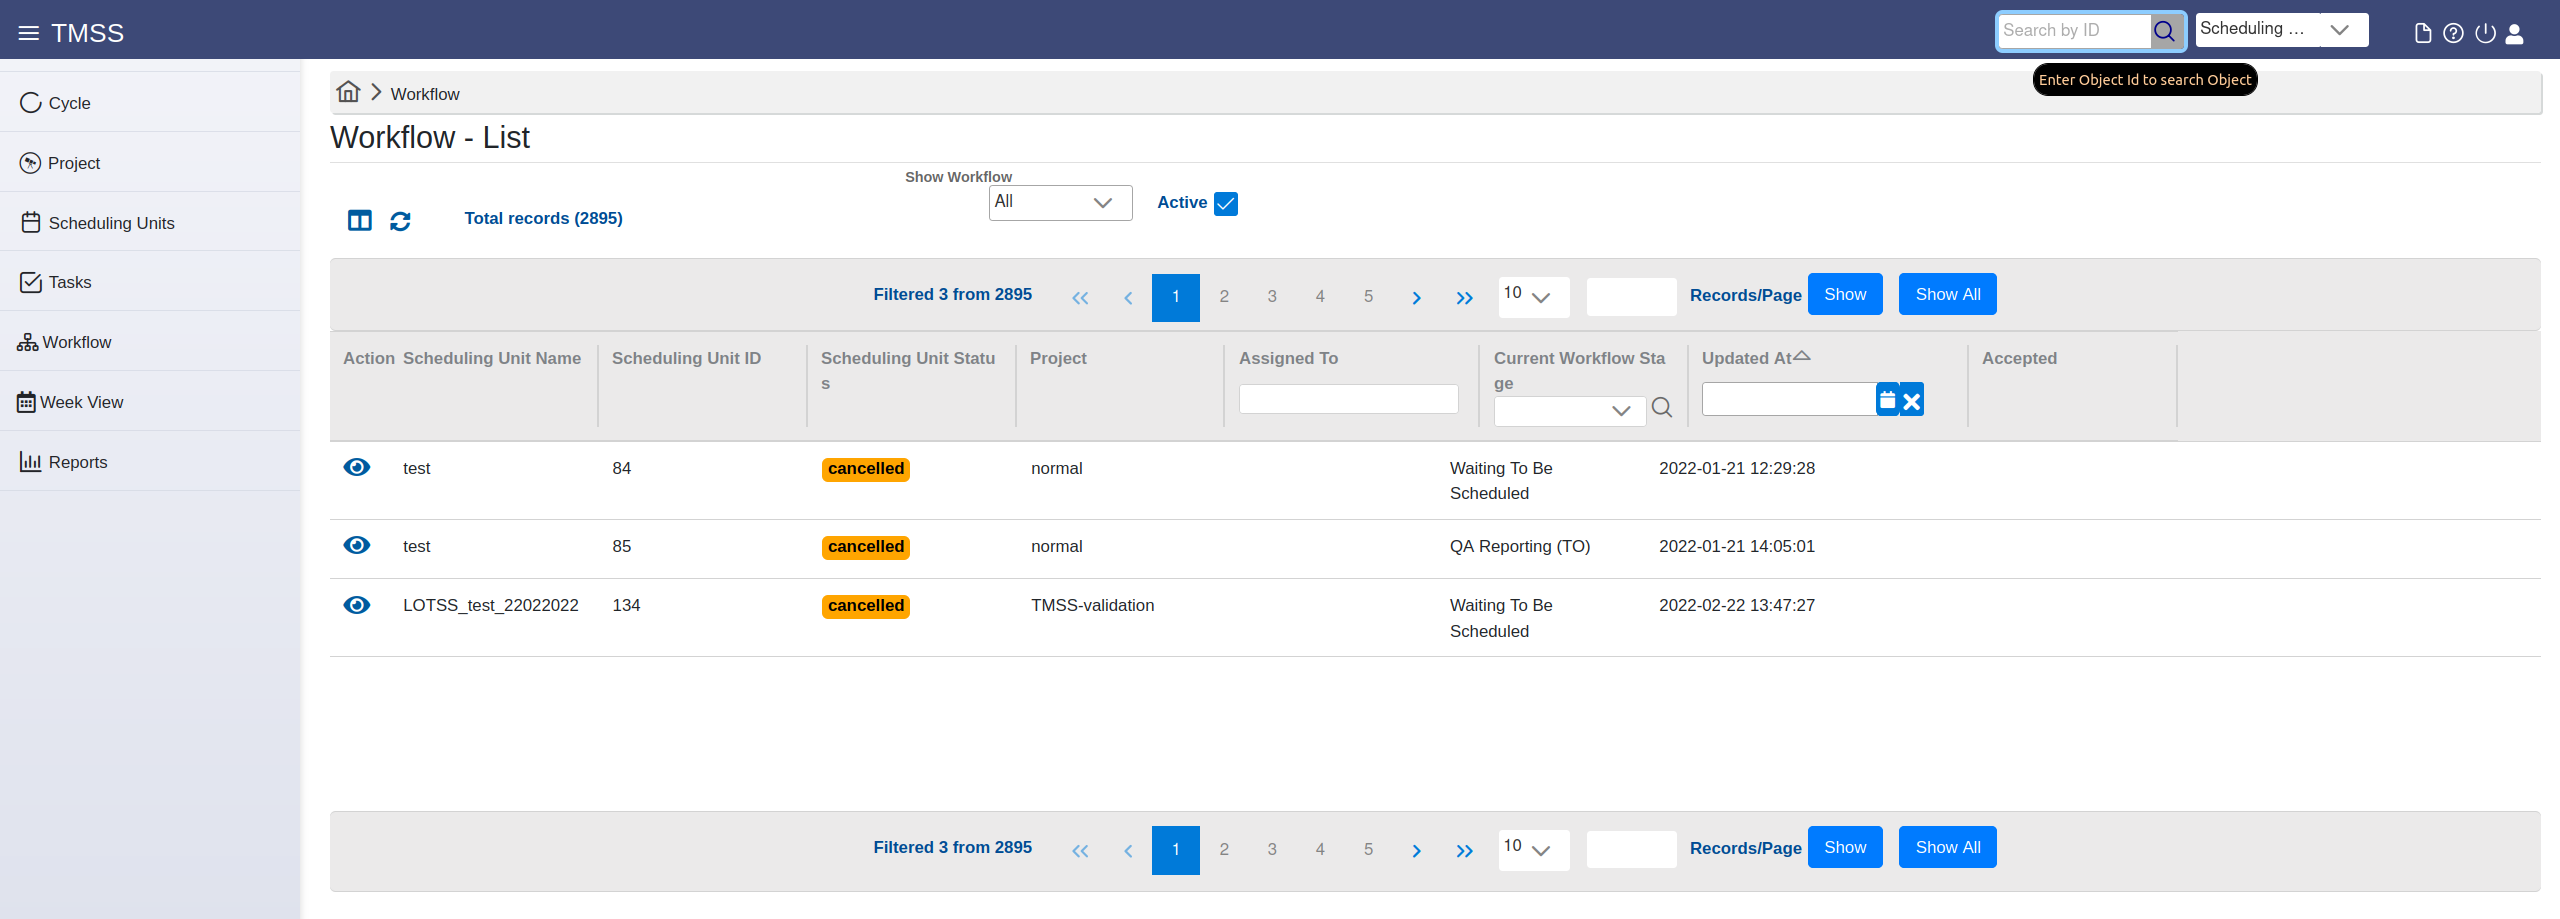
We can see the SUs which workflows are in a state we select from the drop-down above. The checkbox indicates that we filter by default on all active ones, others disappear. To find a particular SU (workflow), the user should make use of the drop-down menu options or use the column filtering options. Workflows are only associated with blueprints, so the IDs referred to here are SU blueprint , not draft IDs. Clicking on the 'eye' ison in the first column will open the workflow page for the corresponding row.
Managing the workflows
The management of the workflows is done through the dedicated workflow view page:
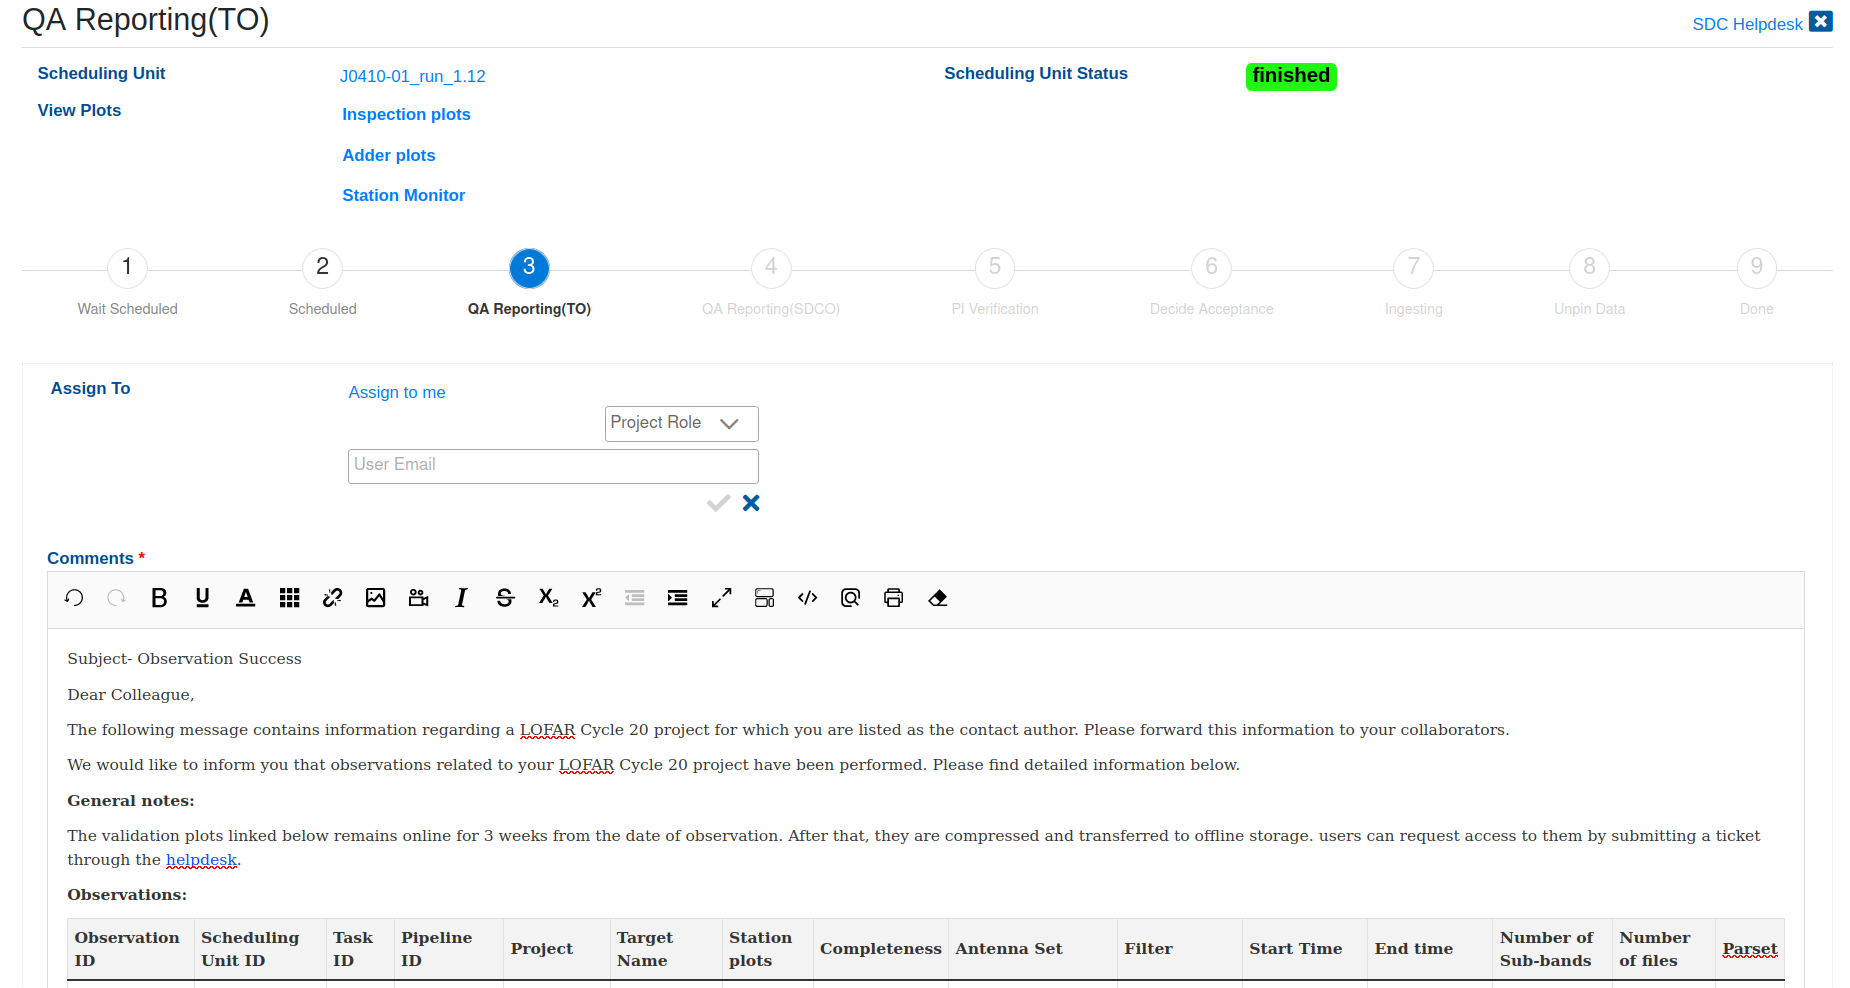
At its top there are links to the SU details page, as well as to the various inspection plots related to the observing run. These can be used by the TO/SDCO/PI as an aid when performing the quality assessment (QA). Below, a graphical representation of the workflow is given consisting of 9 steps, with the number highlighted in blue indicating the current level of progress. Their associated overviews are accessible depending on the role the user has.
If the workflow is not assigned to the current user, s/he can use the "assign to me" to perform the assignment, or choose a user to assign the QA to using an e-mail address, or assign by role, choosing from the roles provided in the "Project Role" drop-down menu.
The QA starts at level 3 where the users with telescope operator (TO) role can enter reports or comments related to the quality of the data and the performance of the system in the provided text area. It is usually pre-populated by a standard observing report.
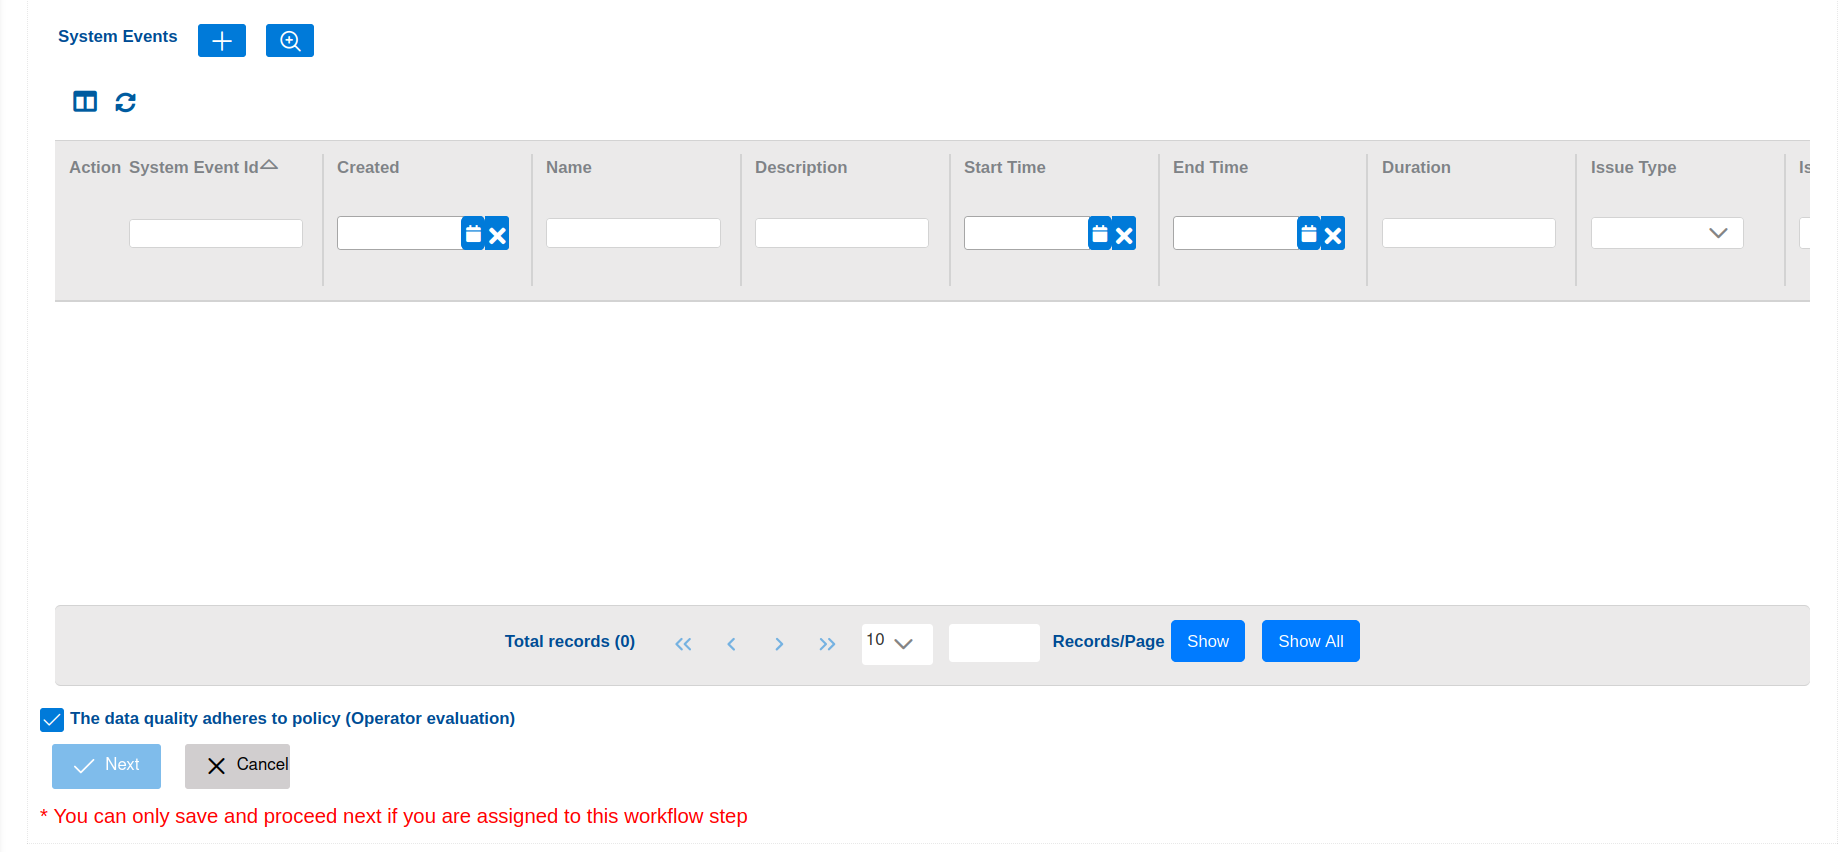
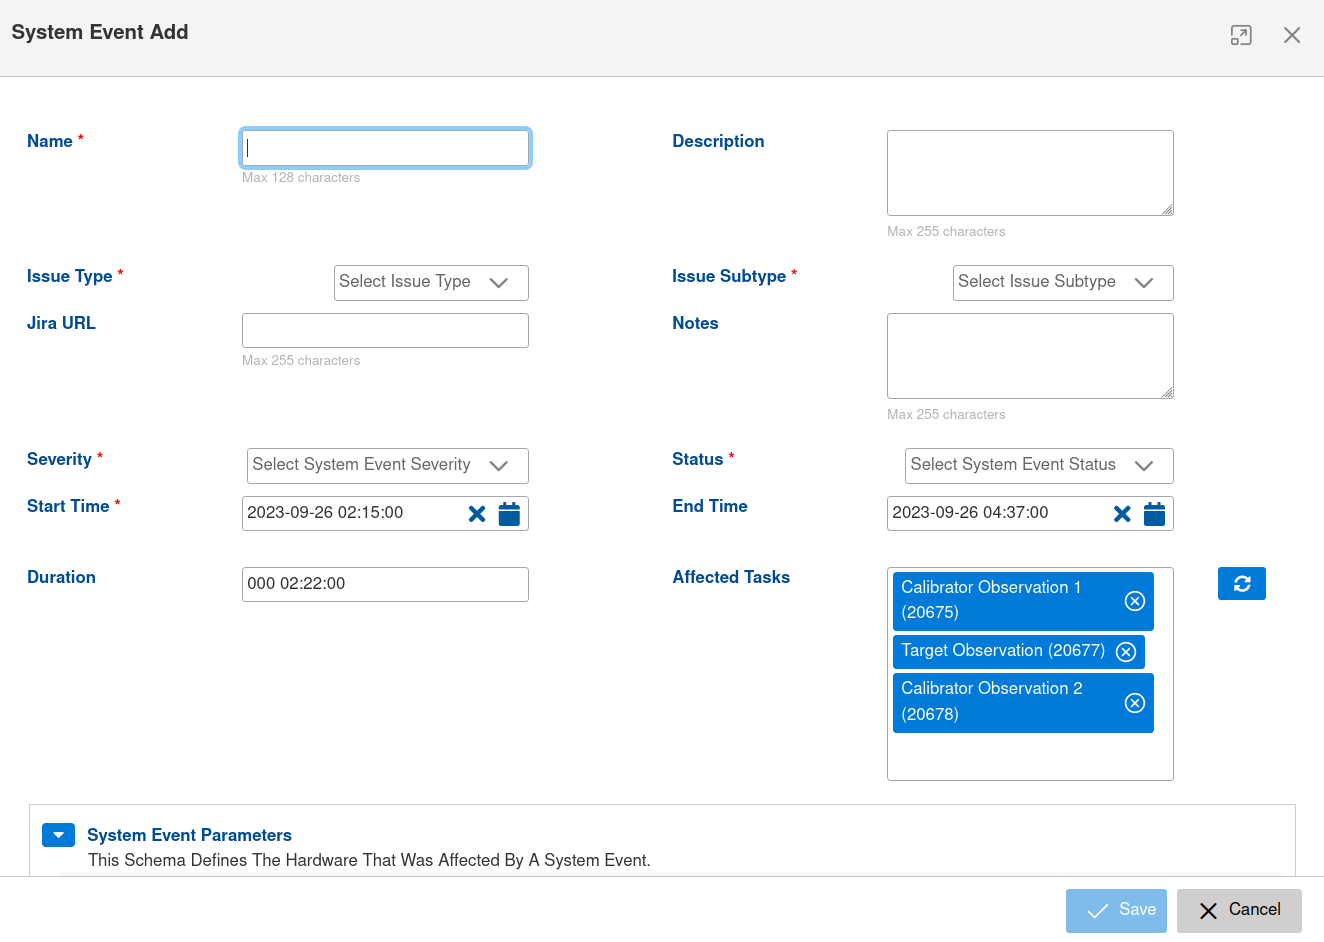
At the bottom of the page, there is a list where the TO can enter system events relevant for the QA by adding an new one (using the "+" button) or by searching for existing ones and adding them to the list (using the "Search" button next to the "+" one). The new event page opens in a pop-up where the user can enter the relevant event details:
The TO can filter the listed system events using the provided column header fields in the list.
Finally, if the TO approves that the data adheres to policy, s/he can click the "Next" button to sent the QA for the following round of assessment by the SDCO/PI.
Each of the users / roles in the workflow steps can approve or disapprove of the data quality and enter an appropriate comment. The approval state is reflected by the state of a checkbox at the bottom of the page after all of the user roles have decided on the QA state. Then, the QA assessment is finished, and the PI has an overview of the procedure. The data is unpinned / deleted or archived depending on the QA outcome.
Please note that SDCO is still using the Jira system for handling observation reports. After the observations and subsequent processing are completed, the PI will be notified via the Jira ticket associated to the project and the requested data products will be made available through the Long Term Archive (LTA) as soon as possible.
...